QuickMeets User Manual
Installation
- Download the installer from www.act4work.com/files/QuickMeets/ to a location you can easily find. Make sure your Act! program is closed.
- Double-click to launch installer and follow prompts until the installation process is complete. There are very few customization options with the setup, so users are recommended to to accept defaults through out.
Configuration
- Launch application from the program menu.
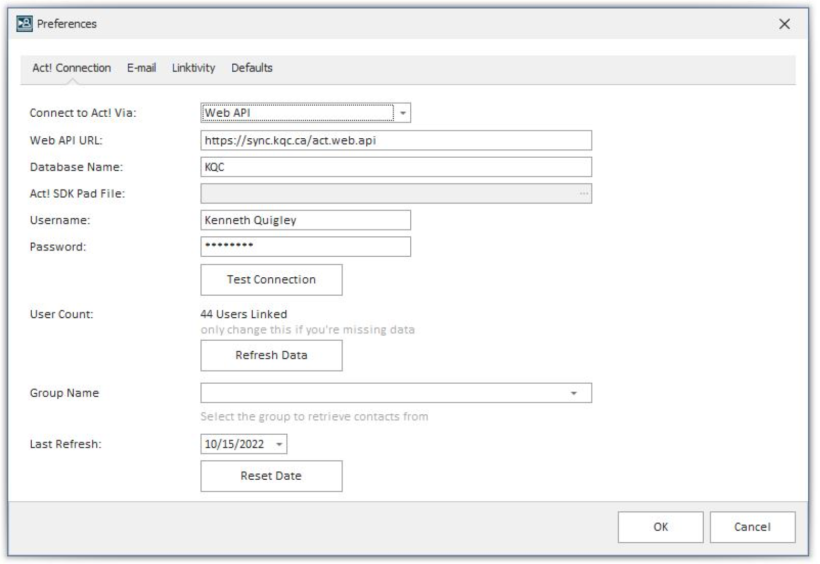
- Click Tools > Preferences, and configure your Act! Connection settings 1 If you’re connecting to a local installation of Act!, choose Local SK from the “Connect to Act! Via” dropdown menu, and fill in the following database and authentication details. 2 If you’re connecting to a remote or hosted database, select Web API, and then fill-in the following API, database, and user credential details. 3 After either case, click “Test Connection” to verify your settings are accurate.
- With this complete, click “Refresh Data” to update user list.
- The Group Name option is useful for designating a Group in Act! to download to QuickMeets. It could be a customer or prospect list, or contacts with whom you’ve engaged with recenty. These can be imported into QuickMeets under the Act! Contacts Tab beside the meeting list.
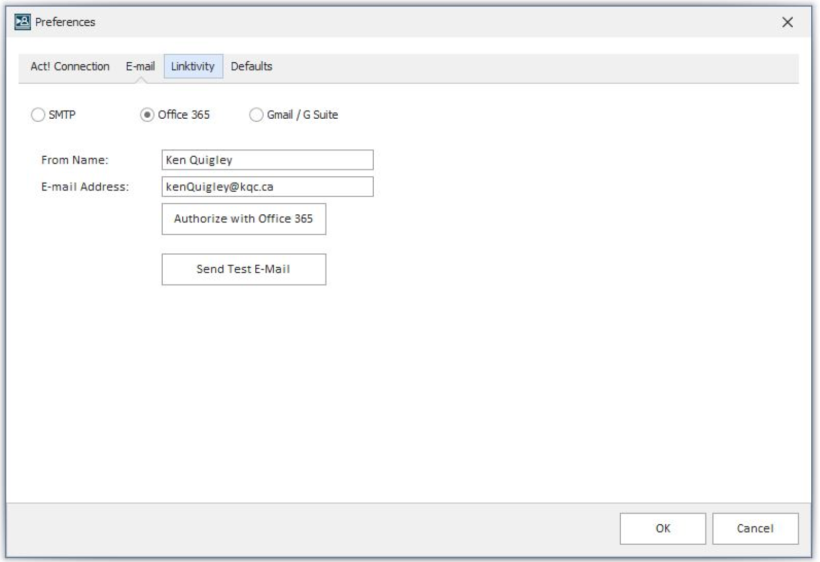
- Click Email from the top drop-down menu to enter the email settings.
- SMTP is where you can configure basic authentication for accounts not using Gmail of Office 365.
- For Gmail and Office 365 accounts, select the appropriate radio button and enter your name and email, and then click Authorize to initiate OAuth connection.
- Once this is completed, click Send test email to verify.
- These settings are required for emailing “Meeting Minutes” after a meeting is completed.
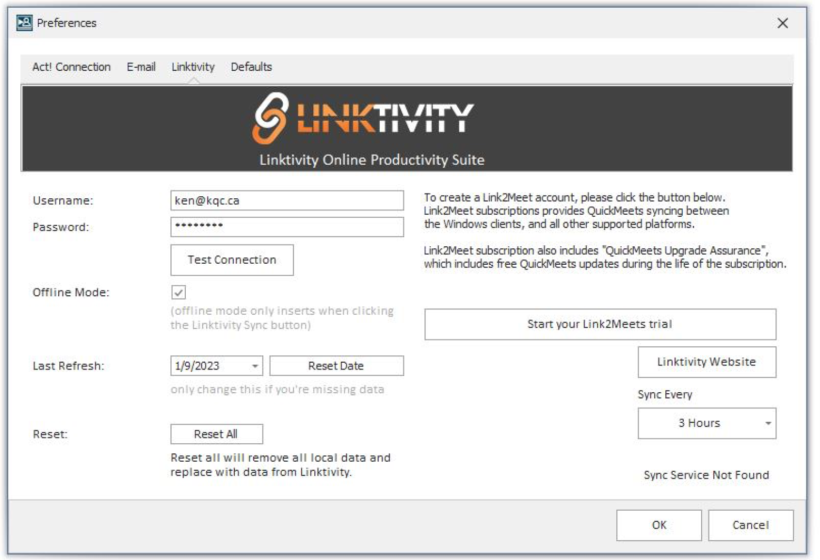
- Click Linktivity to configure your Linktivity settings for syncing between computers.
- If you do not intend to purchase more than one license of QuickMeets to install on multiple computers, you can leave this area blank.
- If you do intend to purchase two or more copies of QuickMeets, please either enter your Linktivity settings, or click the “Start your Link2meets Trial” button to setup a trial for syncing purposes
- With Linktivity setup, we recommend “offline mode” be selected for best performance since Meeting changes won’t need to be written to the online server with each save.
- Please visit Linktivity.net for more information on the online services available with this product suite
- Defaults
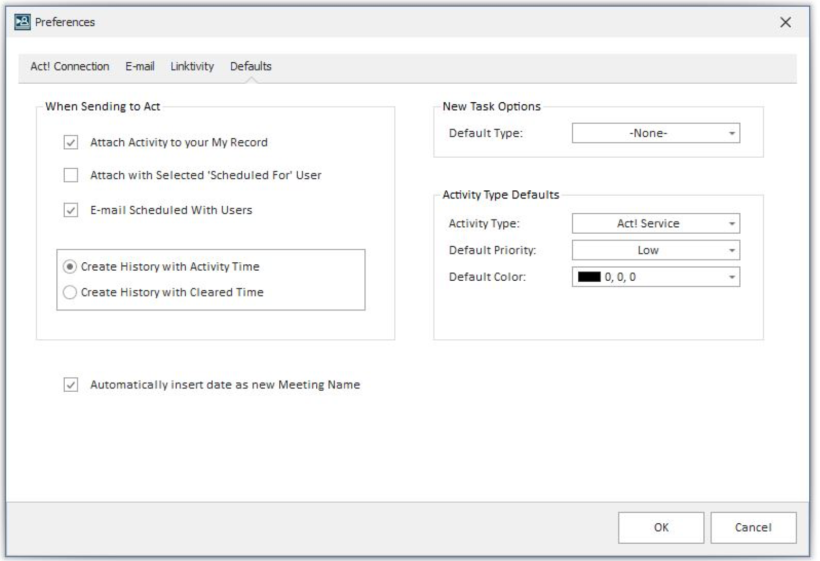
o When Sending to Act!. when you create a meeting with QuickMeets, you can click Send to Act! from the left side Navbar to create a corresponding activity in Act! The following checkboxes are options for this Send to Act! feature
- Attach Activity to your My Record
- Attach with Selected Scheduled For user
- Email Scheduled with Users
o The checkbox for “Insert date as new Meeting Name simplifies the meeting name process since most similar meetings will be grouped in the same “Meeting Types” section, and differ only by date the meeting is scheduled.
User Guide
The following are feature explanations for QuickMeets outside of the meeting process.
NAVBAR Features (left side of QuickMeets program view)
Send to Act!:
This option, as the name implies, allows the user to send a scheduled meeting in QuickMeets to Act!. Please review the Defaults settings in your preferences to ensure they reflect your intentions for this process.
Clear Meeting:
This will clear the meeting from the list view, but not delete record of it. This option should be used sparingly since most users will want to keep track of past meetings and follow-ups, as well as preserve the option to “clone” a meeting when needed. Under the Tools menu there is a “Erase Cleared Meetings” option that will purge these from your QuickMeets database, so be careful which items you clear and subject to that purging process.
Delete Meeting:
For users more concerned with meeting list tidiness than archiving, this is a good option. Please be advised that this Delete step is not reversible and should not be used in cases where meetings notes will never need be referred to again.
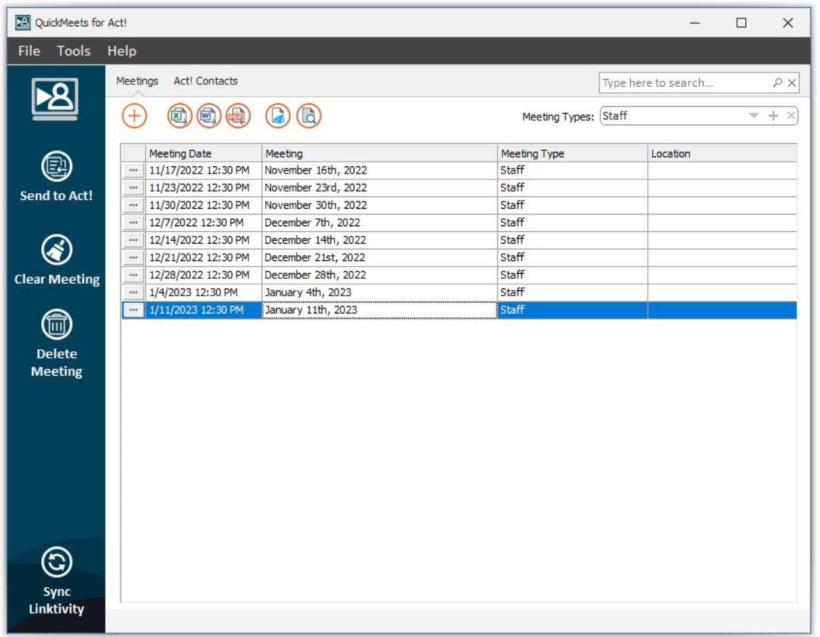
Sync Linktivity:
One of the powerful options of QuickMeets is the ability to sync your meeting records across multiple computers. This allows you to prepare meeting notes on one computer and finalize them on another. This also stores all your details in the cloud so when you setup a new installation, you can retrieve all your meeting lists with a simple sync
Main Drop-Down Menu
- File > Exit
- Tools > Refresh QuickMeets: Forces a refresh of the list view of meetings you have selected.
- Erase Cleared Meetings: This will purge from your database all record of past cleared meetings and can improve sync performance.
- Maintenance includes database maintenance options. The SQL Lite database is stored in your My Documents\QuickMeets subfolder: The database maintenance options include the following:
- Check database
- Compress database
- Reindex database
- Backup & Restore
Report Designer
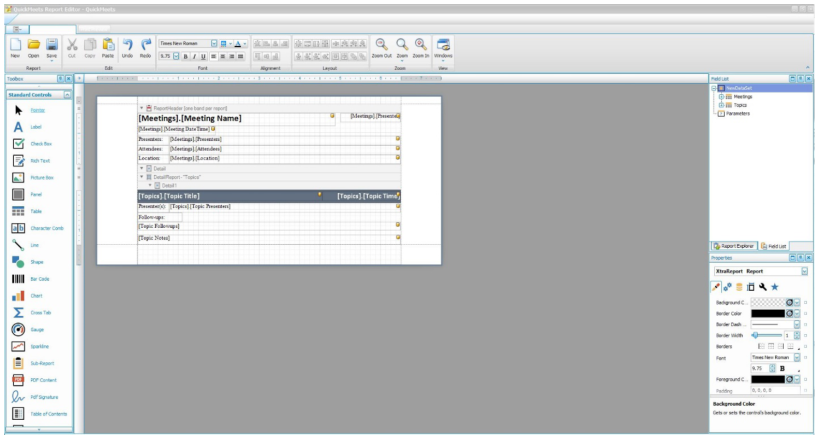
- The default QuickMeets report is copied to My Documents\QuickMeets Reports, but the Designer utility can be used to modify the default layout to suit each user’s needs.
- Preferences (covered earlier)
- Help
- Knowledgebase is hyperlinked to our online KB at kb.act4work.com.
- Contact Support brings you to our support page. The purchase of QuickMeets does not include a support plan, so support for this program is limited to email, chat, and KB. Purchasing QuickMeets with Setup Assistance does NOT include ongoing technical support.
- Check for Updates will check our download server for available “in-version” updates. This feature does not mean the user is entitled to free future version upgrades, just in-version updates.
- About: This option will display your product information including the name, current build, our website, and the license key.
- You can also de-activate your product here if you need to install your license on another computer.
- This section also includes a link to shop our other products online
QuickMeets Sub Menu
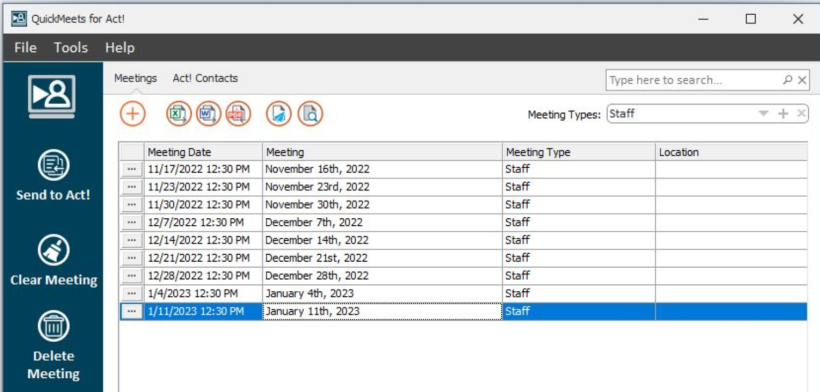
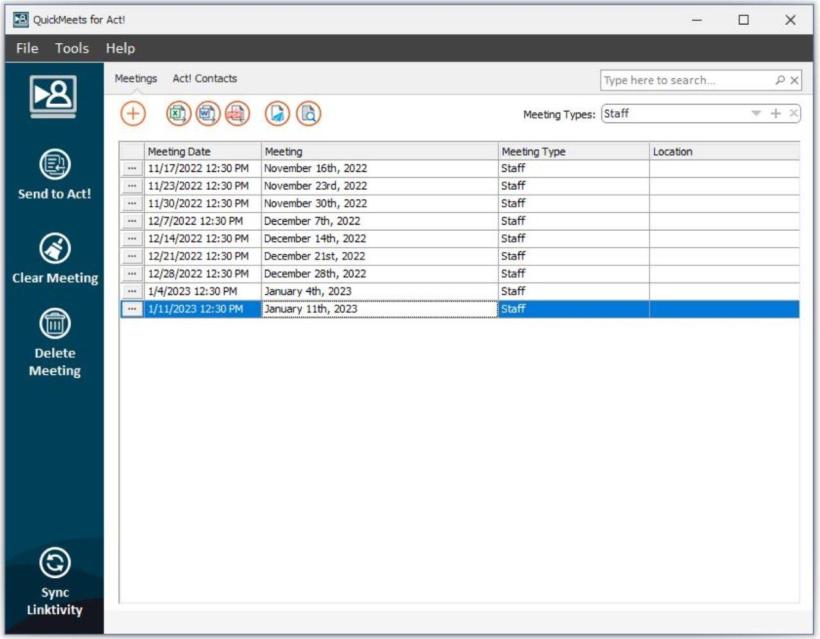
Meetings:
As the name suggest, this tab displays the list of archived meetings, along with the following Action buttons:
- The plus sign is used for creating New Meetings
- Export to Word, Excel, or PDF will render a meeting report for the selected meeting in the output format selected
- Email report button will launch the list of invitees to that meeting, and allow you to select which will be emailed the meeting notes. Move the appropriate invitees to the right column, and click Select to send
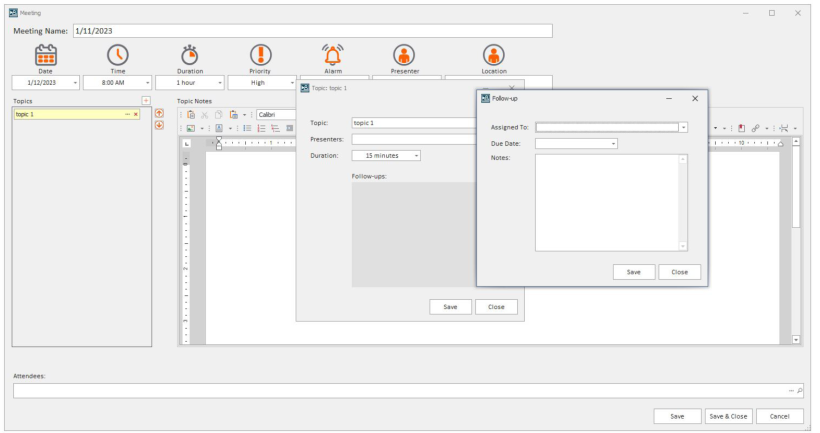
Creating a new Meeting:
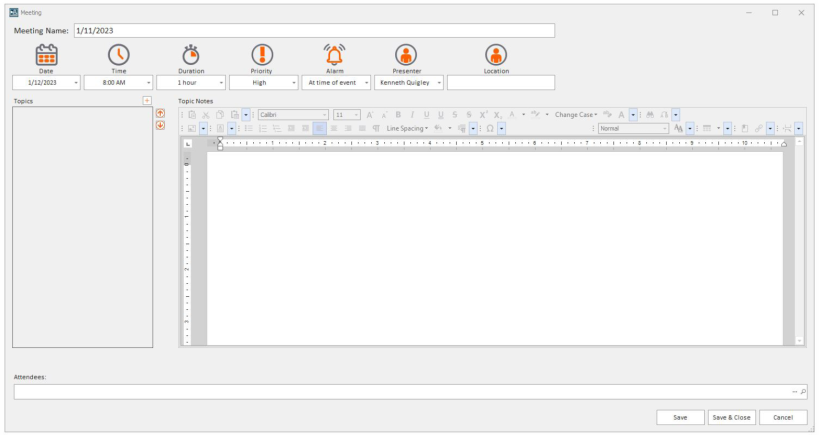
- Click the + sign on the action menu above the Meeting List, and the above screen will display.
- Change the Meeting Name as needed or keep the date default if selected.
- Set the Date Time, Duration, Priority, Alarm, Presenter, and Location details as appropriate.
- Under Topics, you must click the Plus sign to launch the “Create Topic Dialogue box, which will prompt you for the following details.
- Topic Name
- Presenter
- Duration
- Follow-ups are intended for AFTER the meeting, but they can be entered here by clicking on the + sign in the top right corner of that sub section.
- Completing this step will allow you to type in meeting details on the right-hand side. This section cannot be used without a topic created on the left side and selected.
- This section includes a toolbar editor with a wide range of formatting options.
- The user can encompass all the meeting notes under one topic, or add a different topic for each section. This allows the user to designate different users and durations.
- The arrows on the left side allow you to change the sort order of the Topics the user creates
- Under the Attendees section at the bottom, you can select the appropriate users or Act! contacts. To pick from the user list, click the ellipsis, and click the search magnifying glass for the contacts.
- The default option for the Search Contacts dialogue box is to search Existing Contacts, but you can also select “Create New Contact” if the contact is not currently in the database. This option can also be selected if the contact is not initially found amongst the existing ones.
- To search existing contacts, type the name of the contact in full or part, and click Search icon. Due avoid API overheard, type-ahead search is disabled. After you click Search it will display the results of that search, and you select the one you want from the list, or start a new search if needed.
- For users, move all the users scheduled to be in the meeting form the left column to the right after click on the ellipsis, and then click OK.
- Both the Contact and User selection will appear together in the invitee list for this meeting
- Bottom Buttons
- Save: this will save your work but not close the meeting
- Save & Exit: this will save your work, close the meeting, and return you to the Meeting List
- Cancel will discard all unsaved work, and close the meeting
- Follow-ups
This section was implemented to allow those organizing meeting to add deliverables to an agenda, and effectively convert an agenda to minutes, which can be instantly distributed to attendees by email afterward. Here are the steps for using Follow-ups.
- Before or after the meeting, each Topic can be made to include follow-ups or action items. To insert one or more into a topic, click the ellipsis within the topic to launch the Follow-up Dialogue box.
- This dialogue displays the pre-populated Topic name, the presenter, and duration. The + sign to the right of the Follow-ups box below will launch a new sub dialogue box for follow-ups.
- This allows you to display the assignee dropdown box to select the invitee who will be assigned that follow-up. It also includes the due date (no time), and finally a memo field to record details of the follow-up.
Meeting List View
- Editing a meeting: click the left ellipsis or double click on the meeting you want to edit.
- Meeting Types: users can organize their meeting into different sections or cabinets with the Meeting Types feature near the top right of the Meeting List.
- Select the down chevron to select from existing meeting types
- Click the + sign to create a new Meeting Type. Once that new meeting type is created, you’ll be able to create and organize meetings under it
- To delete a Meeting type, click the X and it will prompt you to reassign the meetings under it to another Meeting Type.
- You can also select “All Meeting Types” from the drop-down menu to display all the meetings in all the sections.
- Right Click options: Right-click on a meeting to invoke the following:
- Add Meeting: for creating a new blank meeting.
- Edit Meeting
- Clone Meeting: this option is useful for regular meetings of a certain type or purpose that recur regularly. For instance, if you have a weekly staff meeting which contain the same topics, attendees, and other details, it will save you time to simply close the previous meeting, rather than reproduce all topics and invitees from scratch. Cloning a meeting has the option of doing so with or without notes, based on whether you want to clone the meeting in its entirety, or just it’s structure.
- Clear & Delete options are similar to the Navbar options of the same name.
- Send Outlook invite is great for creating an Outlook invitation for the meeting you have scheduled in QuickMeets. Please note this Outlook Invitation will NOT include the meeting details under your Topics, just the date, time, and location recorded for that meeting.
- Meeting Filters
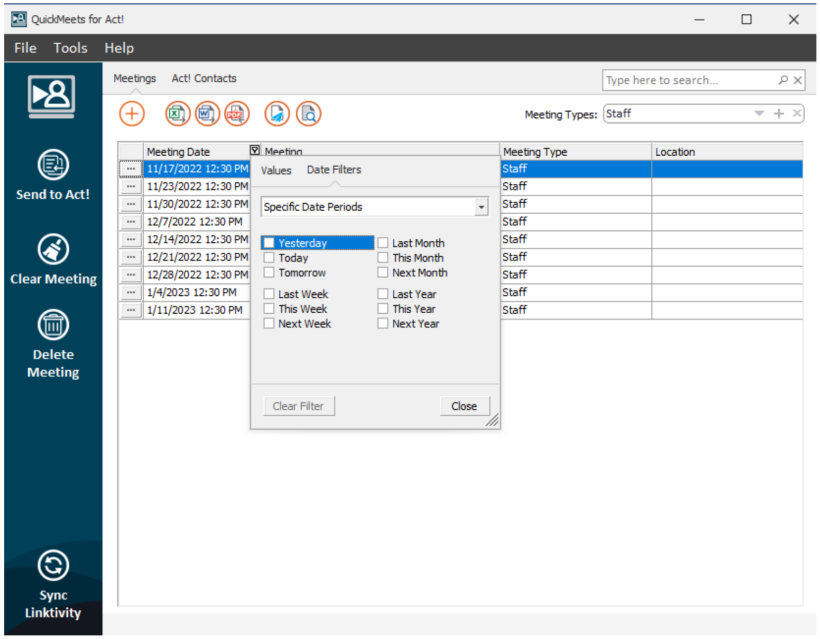
The meeting list includes columns for Meeting Date, Meeting Name, Meeting Type, and Location that are displayed in a grid view. Each of these columns can be filtered by the respective column headers, and the filter options will reflect the data types. For instance:
- Date fields will display a wide selection of date filter options (see above)
- Meeting name fields will display filter options similar to below
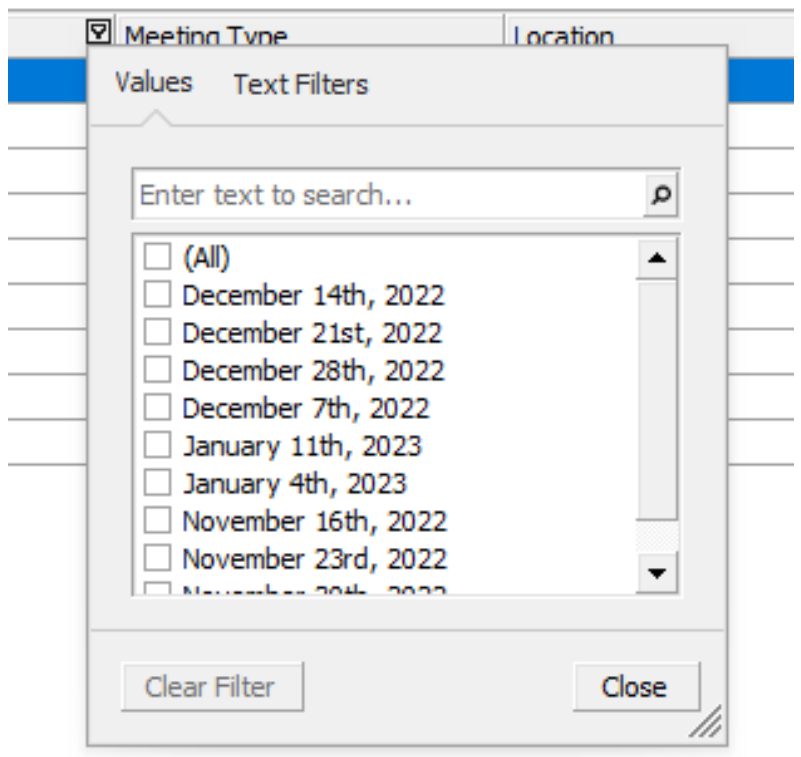
-This is the same for the Type and Location columns, with the Type column filter being most useful when all Meeting Types are being displayed.
- Search
The last option is perhaps the most self-evident, and that is the Search Box in the top right-hand corner. This search box is contextual and will only show results from the displayed list view below. In other words, you can choose to search within the meetings under a certain Type, or select “All Meeting Types” to search all the meetings you have archived.
Summary
QuickMeets allows users to organize their internal and external meetings with their Act! contacts & users in ways never before imagined, while supporting the archiving of a near limit list of meetings of all types.
If you find what you perceive to be a defect, or would simply like to submit a feature request, please go to bugs.kqc.ca to submit your feedback or suggestions accordingly.
This manual was revised in January 2023
To purchase QuickMeets, please visit the following link: https://www.keystroke.ca/en/shop/product/quickmeets-for-act.htm