Knowtifier Features
- Knowtifier Features
- Knowtifier Logs
Creating an Email Notice in Knowtifier
- From the main Knowtifier screen after logging in, click the Add button.
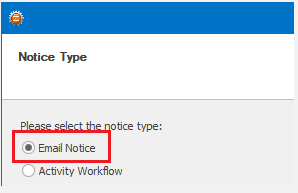
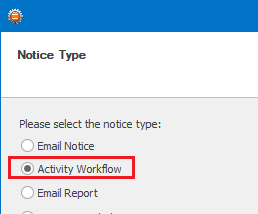
- On the Notice Type screen, select the Email Notice option and press Next.
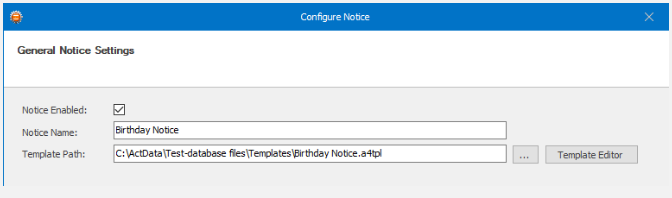
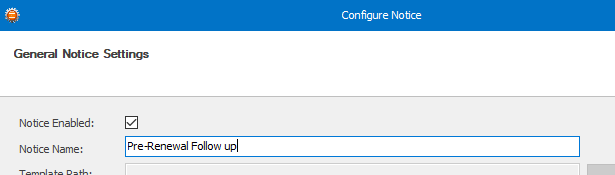
- Enable the notice by enabling the Notice Enabled checkbox.
- Enter a meaningful name in the Notice Name textbox.
- Click the Browse button near the Template Path textbox and select your template. If you do not have a template yet, please create one by following the steps documented in the Knowtifier Setup article. Click Next to continue.
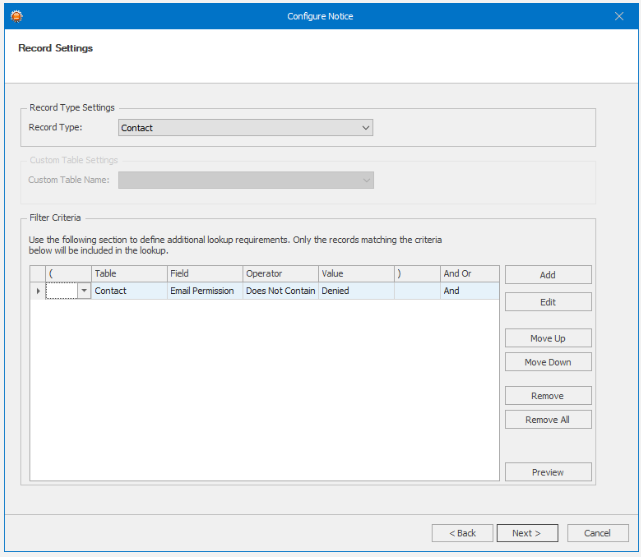
- On the Record Settings screen, select the Record Type that you wish to use. The Record Type setting depends on where your trigger field is located. If you wish to send out these emails based on a Contact field, such as Birthday; then select Contact. Otherwise, select Opportunity, or Custom Table based on your needs. If you select Custom Table, select a Custom Table from the Custom Table Name dropdown.
- In the Filter Criteria section, enter any criteria that will be used to exclude unwanted Contacts. Only Contacts that pass the listed criteria will be included in the email blasts. For example in the screenshot below, we are checking a field called "Email Permission". Only Contacts that do not contain the word "Denied" in that field will be included.
- Click the Preview button to get a quick count of how many Contacts pass the listed filter. Click Next To Continue.
- In the Trigger Settings section, select the trigger type from the top dropdown menu which will change how the notice will be triggered. We will cover these different Trigger types below.
Date Field
- If your notice will be triggered a certain number of days before or after a date field value in your database, select the Date Field option.
- In the Field Name dropdown, select the date field that will be used as a trigger.
- Click the Add button to add one or more day triggers. If you wish to trigger the notice if the date field value equals to the current date, enter 0 as the Day field value. Repeat this process to add as many triggers as you need. For example, if you are sending out renewal notices, you can add triggers for 30, 14, and 7 days to ensure the customer receives multiple notices of renewal before their service is shut down.

Day of Week
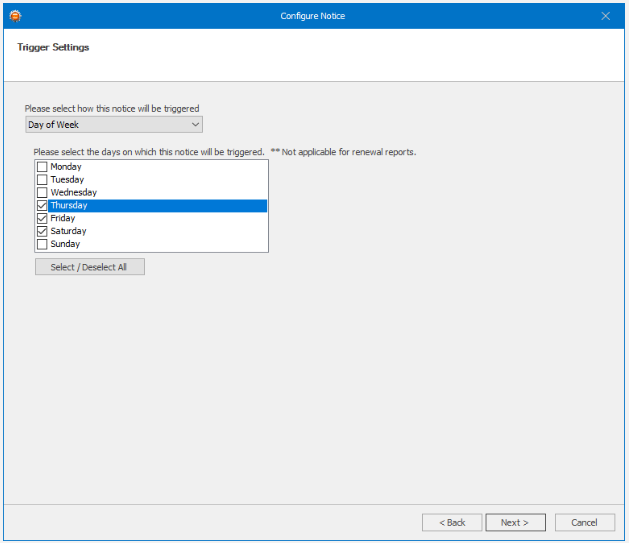
- If your notice is not based on a Date field and you wish to send it to any Contacts that match the Filter Criteria on certain days of the week, select the Day of Week trigger type.
- Select the required days from the list below.
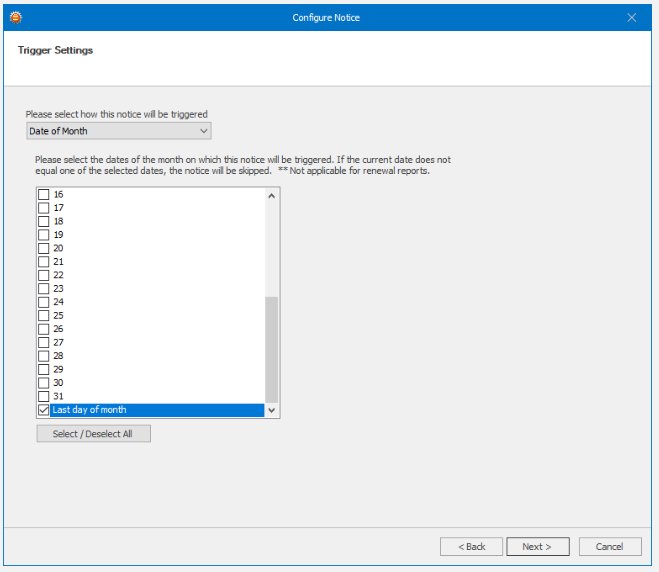
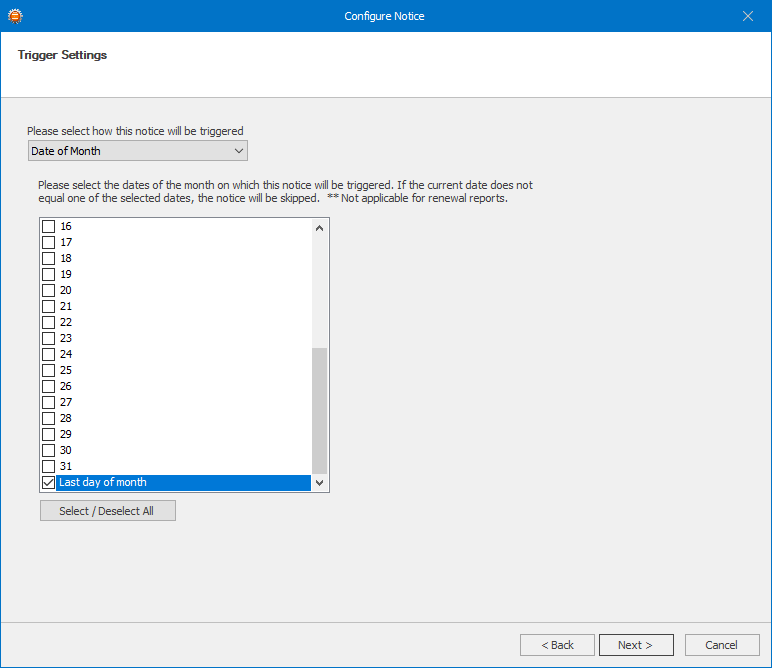
Date of Month
- If your notice is not based on a Date field and you wish to send it to any Contacts that match the Filter Criteria on certain days of the month, select the Day of Month trigger type. From the list select the day of the month you wish the notice to run on. If you always need the notice to run on the last day of the month, select the Last day of month from the list.
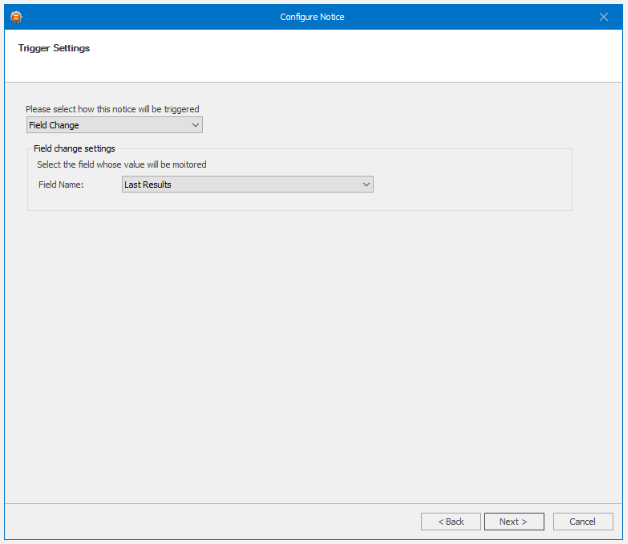
Field Change
- If you wish the notice to run any time a field is changed, select the Field Change trigger, and select the field from the Field Name dropdown. Note that Field changes are tracked once every 15 minutes.
- Once a trigger is chosen, click Next to continue.
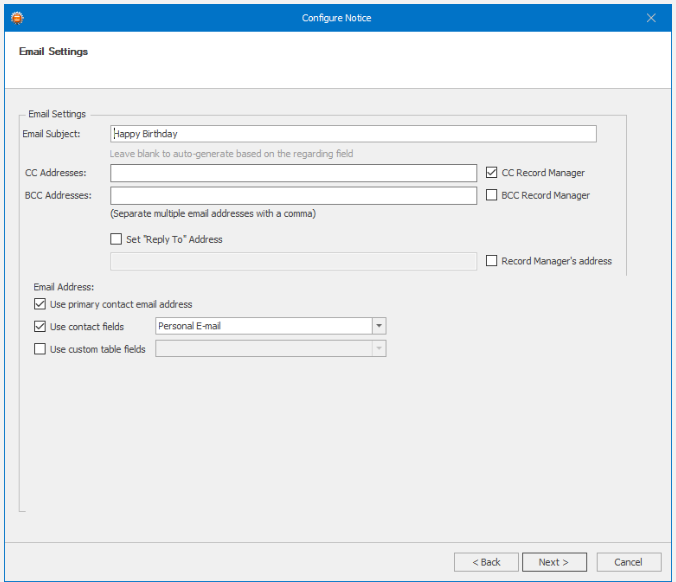
- On the Email Settings screen, enter an Email Subject. As required, enter any CC or BCC addresses in the provided fields. If you wish to CC or BCC the record managers of the Contacts rather than entering a static email address, enable the CC Record Manager or BCC Record Manager checkboxes as required.
- If you wish to change the Reply To address of the email message, enable the Set "Reply To" Address checkbox and either enter the email address, or enable the Record Manager's address checkbox to use the record manager's email.
- In the Email Address section, enable the Use primary contact email address. This is the main E-mail field in Act and will be enabled for most notices. If you wish to CC other email addresses, enable the Use contact fields checkbox, and select any additional email fields. If you are using a record type of Custom Table, you can also enable the Use Custom Table fields checkbox and select one of the fields in your custom table. Click Next to continue.
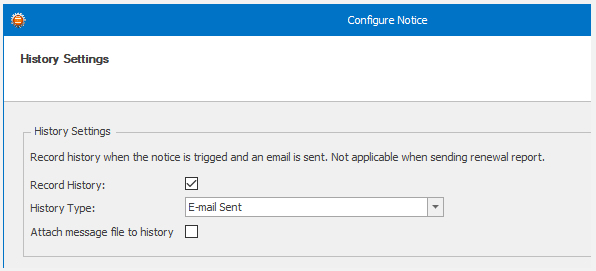
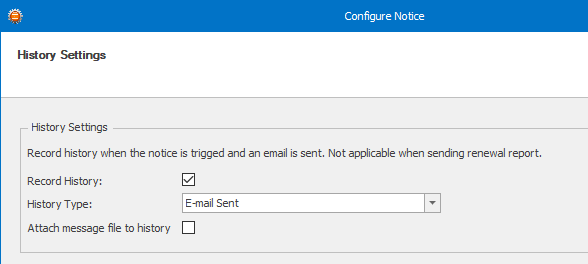
- In the History Settings section, enable the Record History checkbox to create a history record when a notice is sent. Select a History Type from the dropdown. If you wish to record the full email message to history, enable the Attach message file to history checkbox however, this will increase the size of your database's Attachments folder overtime.
- Click Next to continue.
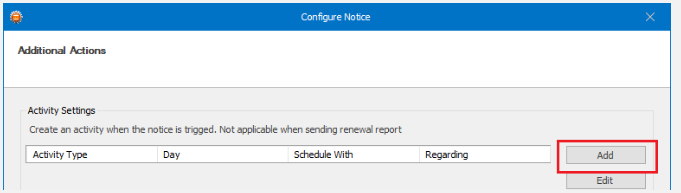
- In the Additional Actions section, Knowtifier can perform a few additional actions once an email is sent such as creating an Activity, or updating a field.
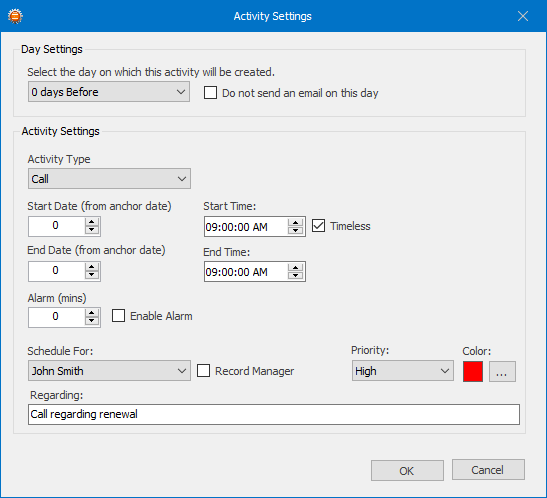
- If you wish to create an Activity, click the Add button in the Activity Settings section.
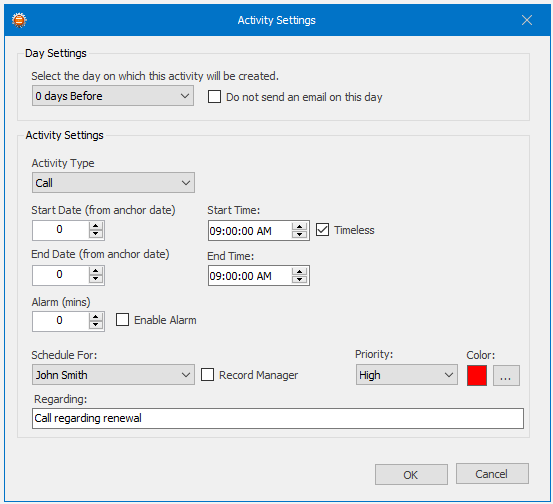
- In the day settings area, select the day the activity will be created on from the dropdown. If you do not wish to send an email and only wish to use this notice to create an activity, enable the Do not send an email on this day checkbox.
- Select the Activity Type from the dropdown menu.
- Enter a number for the Start and End Date fields. This number will be subtracted from the trigger date's value in order to get the new Start/End Date. For example, if you are setting up a renewal notice and you are sending out a renewal notice 7 days before the renewal, you can enter 1 in the Start and End Date fields so that an activity is created for 1 day before the renewal date.
- Populate the rest of the activity fields similar to the native Act activity settings and press OK to save this activity setting.
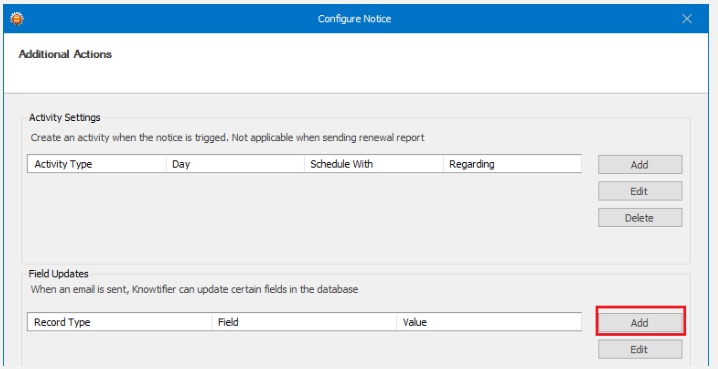
- Back on the Additional Actions screen, if you wish to update an Act field once the email is sent, click the Add button on the Field Updates section.
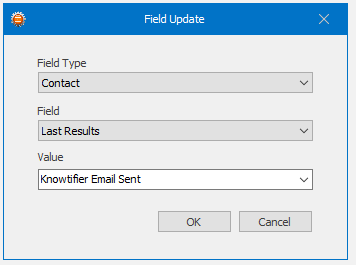
- Select the Record Type, Field, and Value and press OK to save the changes. This process can be repeated in order to update multiple fields. For Yes/No fields, you can simply enter True or False as the value.
- Press Next on the Additional Actions screens, and finally click Finish to save the notice.
- To save the notice to disk so that the Knowtifier service can load your changes, press the Apply button.
Creating Activity Workflow notice in Knowtifier
- From the main Knowtifier screen after logging in, click the Add button.
- On the Notice Type screen, select the Activity Workflow option and press Next.
- Enable the notice by enabling the Notice Enabled checkbox.
- Enter a meaningful name in the Notice Name textbox. Click Next to continue.
- On the Record Settings screen, select the Record Type that you wish to use. The Record Type setting depends on where your trigger field is located. If you wish to send out these emails based on a Contact field, such as Birthday; then select Contact. Otherwise, select Opportunity, or Custom Table based on your needs. If you select Custom Table, select a Custom Table from the Custom Table Name dropdown.
- In the Filter Criteria section, enter any criteria that will be used to exclude unwanted Contacts. Only Contacts that pass the listed criteria will be included in the email blasts. For example in the screenshot below, we are checking a field called "Email Permission". Only Contacts that do not contain the word "Denied" in that field will be included.
- Click the Preview button to get a quick count of how many Contacts pass the listed filter. Click Next To Continue.

In the Trigger Settings section, select the trigger type from the top dropdown menu which will change how the notice will be triggered. We will cover these different Trigger types below.
Date Field
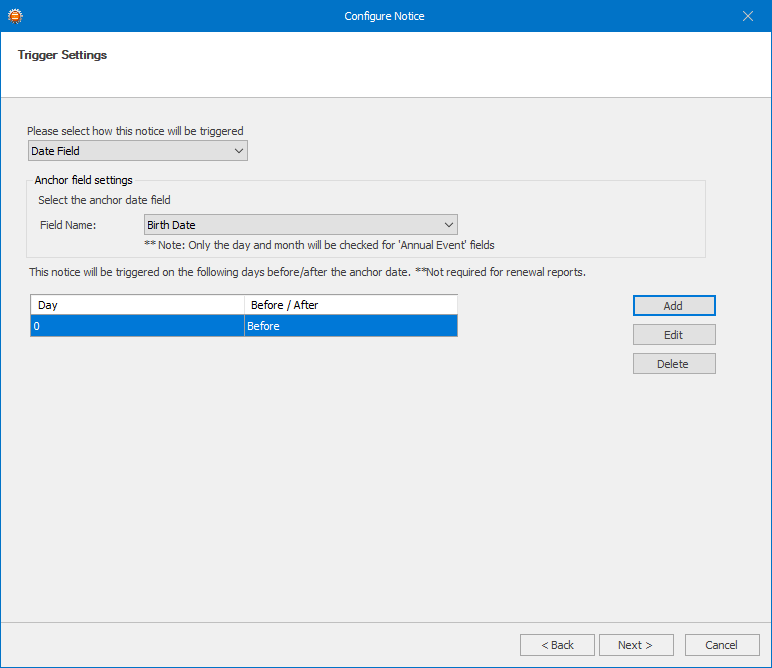
- If your notice will be triggered a certain number of days before or after a date field value in your database, select the Date Field option.
- In the Field Name dropdown, select the date field that will be used as a trigger.
- Click the Add button to add one or more day triggers. If you wish to trigger the notice if the date field value equals to the current date, enter 0 as the Day field value. Repeat this process to add as many triggers as you need. For example, if you are sending out renewal notices, you can add triggers for 30, 14, and 7 days to ensure the customer receives multiple notices of renewal before their service is shut down.
Day of Week
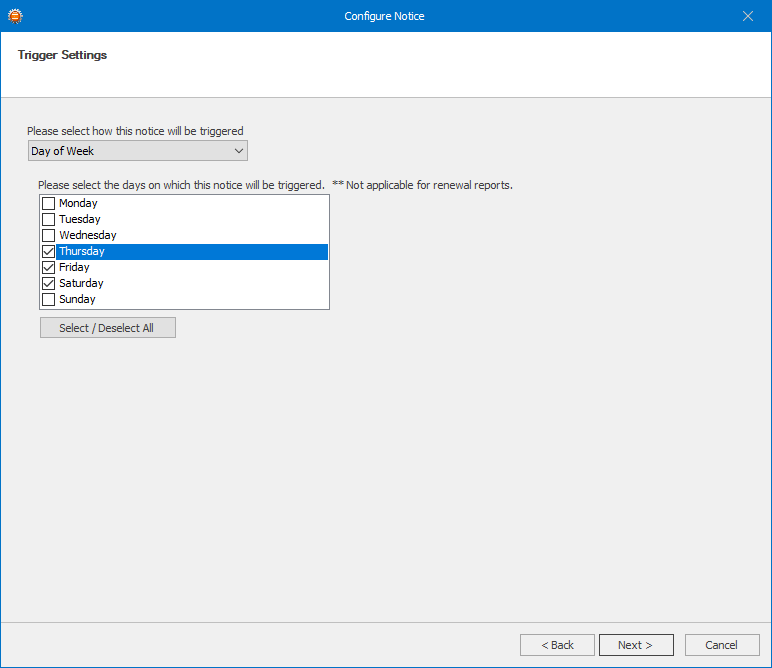
- If your notice is not based on a Date field and you wish to send it to any Contacts that match the Filter Criteria on certain days of the week, select the Day of Week trigger type.
- Select the required days from the list below.
Date of Month
- If your notice is not based on a Date field and you wish to send it to any Contacts that match the Filter Criteria on certain days of the month, select the Day of Month trigger type. From the list select the day of the month you wish the notice to run on. If you always need the notice to run on the last day of the month, select the Last day of month from the list.

Field Change
- If you wish the notice to run any time a field is changed, select the Field Change trigger, and select the field from the Field Name dropdown. Note that Field changes are tracked once every 15 minutes.

- Once a trigger is chosen, click Next to continue.
- In the Additional Actions section, click the Add button in the Activity Settings section.

- In the day settings area, select the day the activity will be created on from the dropdown.
- Select the Activity Type from the dropdown menu.
- Enter a number for the Start and End Date fields. This number will be subtracted from the trigger date's value in order to get the new Start/End Date. For example, if you are setting up a renewal notice and you are sending out a renewal notice 7 days before the renewal, you can enter 1 in the Start and End Date fields so that an activity is created for 1 day before the renewal date.
- Populate the rest of the activity fields similar to the native Act activity settings and press OK to save this activity setting.
- Press Next on the Additional Actions screens, and finally click Finish to save the notice.
- To save the notice to disk so that the Knowtifier service can load your changes, press the Apply button.
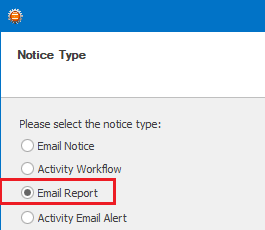
Creating an Email Report Notice in Knowtifier
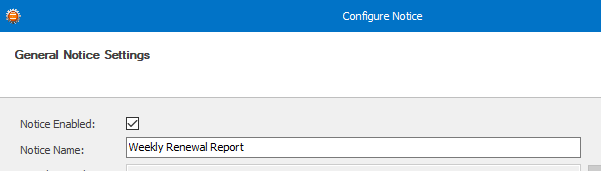
- Enable the notice by enabling the Notice Enabled checkbox.
- Enter a meaningful name in the Notice Name textbox. Click Next to continue.
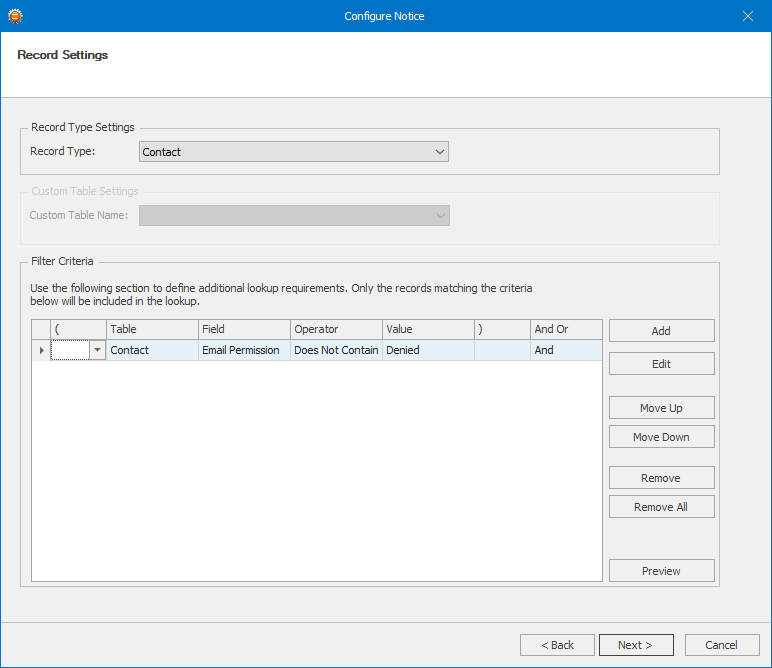
- On the Record Settings screen, select the Record Type that you wish to use. The Record Type setting depends on where your trigger field is located. If you wish to send out these emails based on a Contact field, such as Birthday; then select Contact. Othewise, select Opportunity, or Custom Table based on your needs. If you select Custom Table, select a Custom Table from the Custom Table Name dropdown.
- In the Filter Criteria section, enter any criteria that will be used to exlude unwanted Contacts. Only Contacts that pass the listed criteria will be included in the email blasts. For example in the screenshot below, we are checking a field called "Email Permission". Only Contacts that do not contain the word "Denied" in that field will be included.
- Click the Preview button to get a quick count of how many Contacts pass the listed filter. Click Next To Continue.
- In the Trigger Settings section, select the trigger type from the top dropdown menu which will change how the notice will be triggered. If the report does not rely on a anchor date field, enable the report does not require an anchor date field checkbox. Enabling this option will mean that the report will include all records that pass the filter criteria defined on the previous page. We will cover these different Trigger types below.
Date Field
- If your notice will be triggered a certain number of days before or after a date field value in your database, select the Date Field option.
- In the Field Name dropdown, select the date field that will be used as a trigger.
- Click the Add button to add one or more day triggers. If you wish to trigger the notice if the date field value equals to the current date, enter 0 as the Day field value. Repeat this process to add as many triggers as you need. For example, if you enter a value of 7 days before, your report will include a list of records where the anchor date is 7 days from today.

Day of Week
- If your notice is not based on a Date field and you wish to send it to any Contacts that match the Filter Criteria on certain days of the week, select the Day of Week trigger type.
- Select the required days from the list below.

Date of Month
- If your notice is not based on a Date field and you wish to send it to any Contacts that match the Filter Criteria on certain days of the month, select the Day of Month trigger type. From the list select the day of the month you wish the notice to run on. If you always need the notice to run on the last day of the month, select the Last day of month from the list.
- Once a trigger is chosen, click Next to continue.
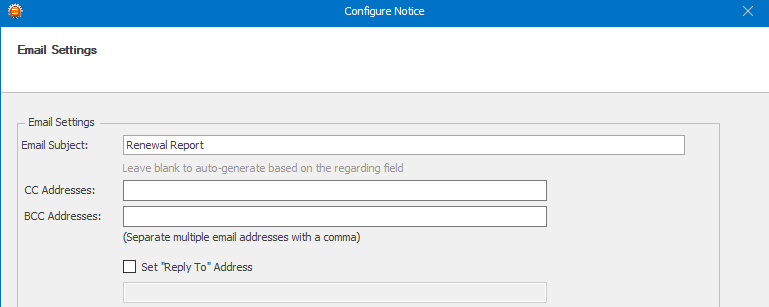
- On the Email Settings screen, enter an Email Subject. As required, enter any CC or BCC addresses in the provided fields. If you wish to change the Reply To address of the email message, enable the Set "Reply To" Address checkbox and either enter the email address.
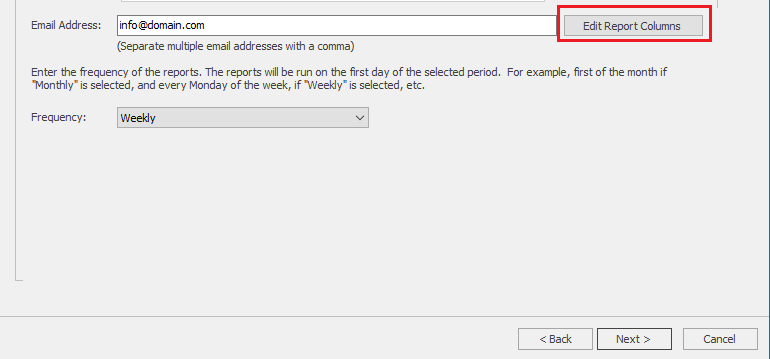
- In the Email Address field, enter the email address of the person that will receive the report.
- Select how often the report will be sent by selecting a value in the Frequency dropdown.
- Click the Edit Report Columns to show columns of your choice in the report.
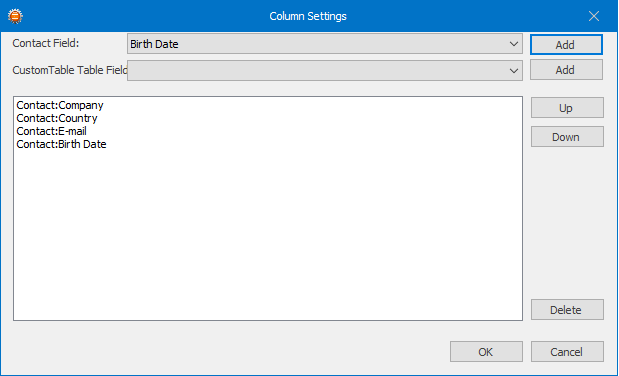
On the Column Settings dialog, first select the field you wish to display from either the Contact Field dropdown, or Custom Table Field dropdown if your record type is Custom Table. Click the Add button beside the dropdown to add the selcted field to your report. You may reorganize the fields by selecting one of the fields and press the Up or Down buttons. Once satisfied, click OK to save the columns, and press Next to continue.
- Finally click Finish to save the notice. To save the notice to disk so that the Knowtifier service can load your changes, press the Apply button.
Creating an Activity Email Alert in Knowtifier
- From the main Knowtifier screen after logging in, click the Add button.
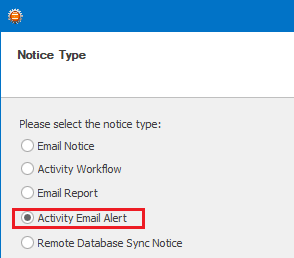
- On the Notice Type screen, select the Activity Email Notice option and press Next.
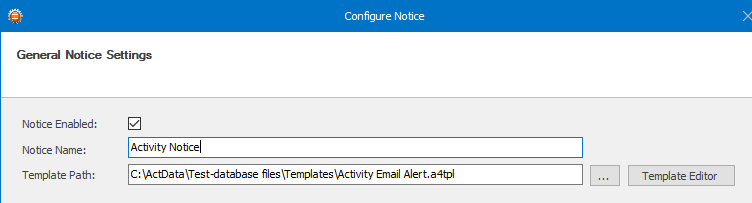
- Enable the notice by enabling the Notice Enabled checkbox.
- Enter a meaningful name in the Notice Name textbox.
- Click the Browse button near the Template Path textbox and select your template. If you do not have a template for your activity notice yet, please create one by following the steps documented in the Knowtifier Setup article. Click Next to continue.
- On the User Settings screen, select the users whos activities will be monitored by Knowtifier, select All Users to monitor all current and future users. Press Next to continue.

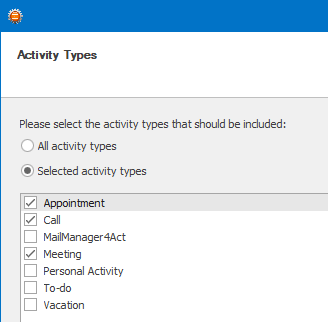
- On the Activity Types screen, select the activity types that will be monitored. We recommend excluding personal activity types such as Vacation, To-do, etc. Press Next to Continue.
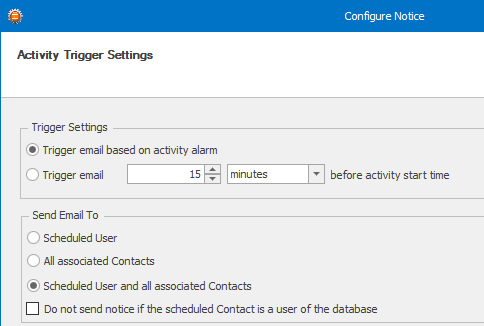
- On the Activity Trigger Settings screen, select the trigger type in the Trigger Settings section. If you wish the notice to send out an email depending on the value entered in the Alarm field of the activity, select the Trigger email based on activity alarm option. If you would always like to send out the alert a specific time before the activity start time, select the Trigger email __ before activity start time option, and enter a value as shown below. For timeless activities, the notice will be sent out an noon.
- In the Send Email To section, select which people will receive the alerts. Scheduled User option will send the alert to the Act User who the activity is scheduled for. The All associated Contacts option will send the alert to only the Contacts that the activity is scheduled with. The Scheduled User and all associated Contacts option will send notice to both the User and Contacts.
- If you schedule activities with Act users and wish for them to be excluded, enable the Do not send notice if the scheduld Contact is a user of the database option. Press Next to continue.
- On the Email Settings screen, enter an Email Subject. As required, enter any CC or BCC addresses in the provided fields. If you wish to CC or BCC the record managers of the Contacts rather than entering a static email address, enable the CC Record Manager or BCC Record Manager checkboxes as required.
- If you wish to change the Reply To address of the email message, enable the Set "Reply To" Address checkbox and either enter the email address, or enable the Record Manager's address checkbox to use the record manager's email.
- In the Email Address section, enable the Use primary contact email address. This is the main E-mail field in Act and will be enabled for most notices. If you wish to CC other email addresses, enable the Use contact fields checkbox, and select any additional email fields. If you are using a record type of Custom Table, you can also enable the Use Custom Table fields checkbox and select one of the fields in your custom table. Click Next to continue.

- In the History Settings section, enable the Record History checkbox to create a history record when a notice is sent. Select a History Type from the dropdown. If you wish to record the full email message to history, enable the Attach message file to history checkbox however, this will increase the size of your database's Attachments folder overtime.
- Click Next to continue.
- Finally click Finish to save the notice.
- To save the notice to disk so that the Knowtifier service can load your changes, press the Apply button.
Creating Remote Database Sync notice in Knowtifier
- From the main Knowtifier screen after logging in, click the Add button.
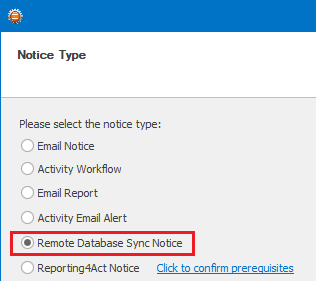
- On the Notice Type screen, select the Remote Dataabse Sync Notice option and press Next.
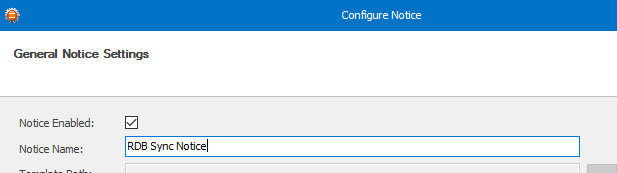
- Enable the notice by enabling the Notice Enabled checkbox.
- Enter a meaningful name in the Notice Name textbox. Click Next to continue.
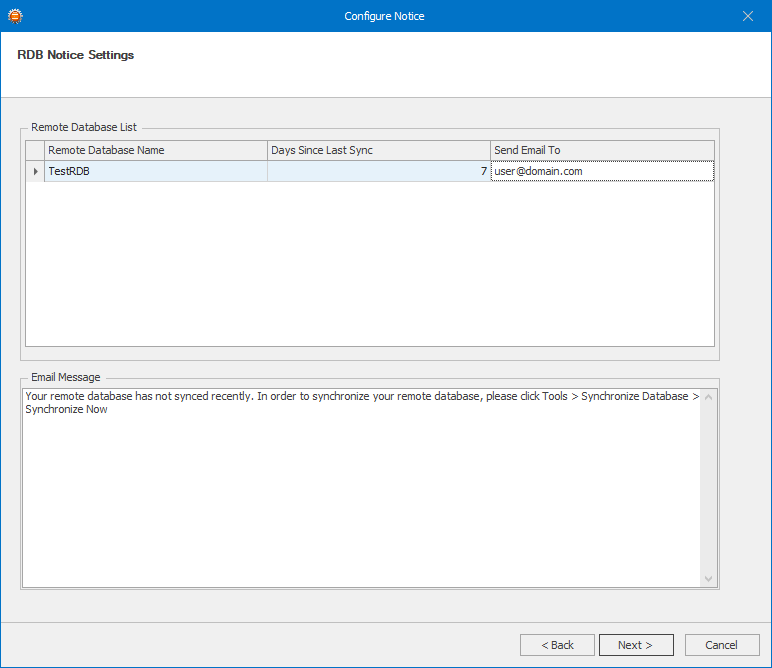
- On the RDB Notice Settings screen, you will see a list of remote databases currently active.
- If you wish to monitor the synchronization of a remote database, enter an email address in the Send Email To column for that remote database, otherwise leave it blank.
- Change the number of days in the Days Since Last Sync column as needed. Knowtifier will send an email once the remote database has not synced in the number of days defined in this column.
- Enter a brief message in the Email Message section at the bottom.
- Press Next, and finally click Finish to save the notice.
- To save the notice to disk so that the Knowtifier service can load your changes, press the Apply button.
Creating a Reporting4Act Notice in Knowtifier
- Before beginning, please note that Reporting4Act program must not be running when the Knowtifier service runs each to day process these Reporting4Act notices. If your Knowtifier service is set to run after-hours, please ensure you close Reporting4Act at the end of the day so that Knowtifier does not run into any issues when the Reporting4Act notice is triggered.
- From the main Knowtifier screen after logging in, click the Add button.
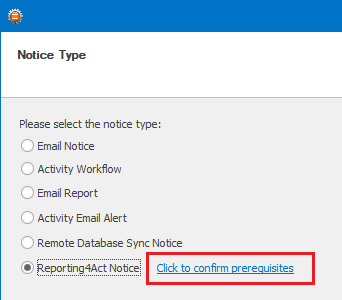
- On the Notice Type screen, select the Reporting4Act Notice option. If this is the first time you are setting up this notice, click the click to confirm prerequisites link.
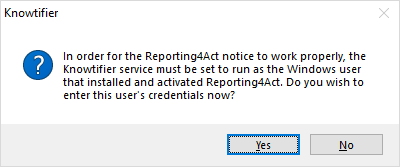
- Since Reporting4Act is installed on a per user basis, Knowtifier service must also run as the user that installed Reporting4Act. Press Yes to enter this user's credentials.
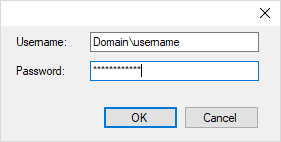
- Enter the credentials in the textbox provided. By default it should pre-populate the current user's credentials.
- Once the credentials are set, we recommend, you click Cancel on the wizard and restart the Knowtifier service by clicking Settings > Restart. Once the service is restarted, return to this wizard to continue adding the notice.
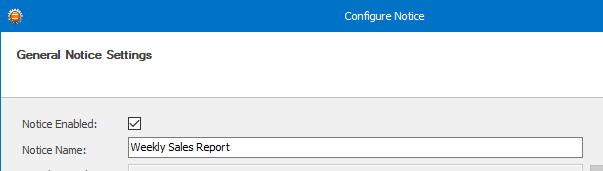
- Enable the notice by enabling the Notice Enabled checkbox.
- Enter a meaningful name in the Notice Name textbox. Click Next to continue.
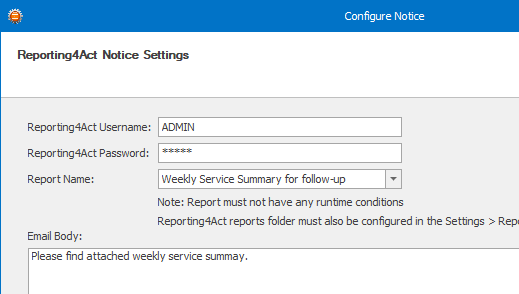
- In the Reporting4Act Notice Settings screen, enter your Reporting4Act Username and Reporting4Act Password.
- Select your report from the Report Name dropdown.
- Enter some text in the email body. Press Next to continue.
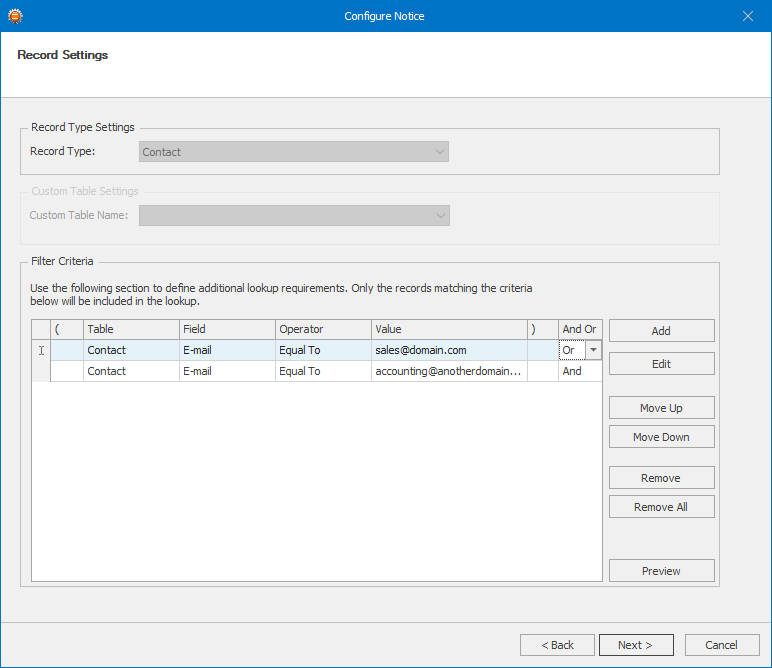
- On the Record Settings screen
- Enter any criteria that will be used to exclude unwanted Contacts in the Filter Criteria section. Only Contacts that pass the listed criteria will be included in the email blasts. For example in the screenshot below, we are checking the "Email" so that the report is sent out to only the email addresses listed below.
- Click the Preview button to get a quick count of how many Contacts pass the listed filter. Click Next To Continue.
- In the Trigger Settings section, select the trigger type from the top dropdown menu which will change how the notice will be triggered. We will cover these different Trigger types below.
Date Field
- If your notice will be triggered a certain number of days before or after a date field value in your database, select the Date Field option.
- In the Field Name dropdown, select the date field that will be used as a trigger.
- Click the Add button to add one or more day triggers. If you wish to trigger the notice if the date field value equals to the current date, enter 0 as the Day field value. Repeat this process to add as many triggers as you need.

Day of Week
- If your notice is not based on a Date field and you wish to send it to any Contacts that match the Filter Criteria on certain days of the week, select the Day of Week trigger type.
- Select the required days from the list below.

Date of Month
- If your notice is not based on a Date field and you wish to send it to any Contacts that match the Filter Criteria on certain days of the month, select the Day of Month trigger type. From the list select the day of the month you wish the notice to run on. If you always need the notice to run on the last day of the month, select the Last day of month from the list.

- Once a trigger is chosen, click Next to continue.
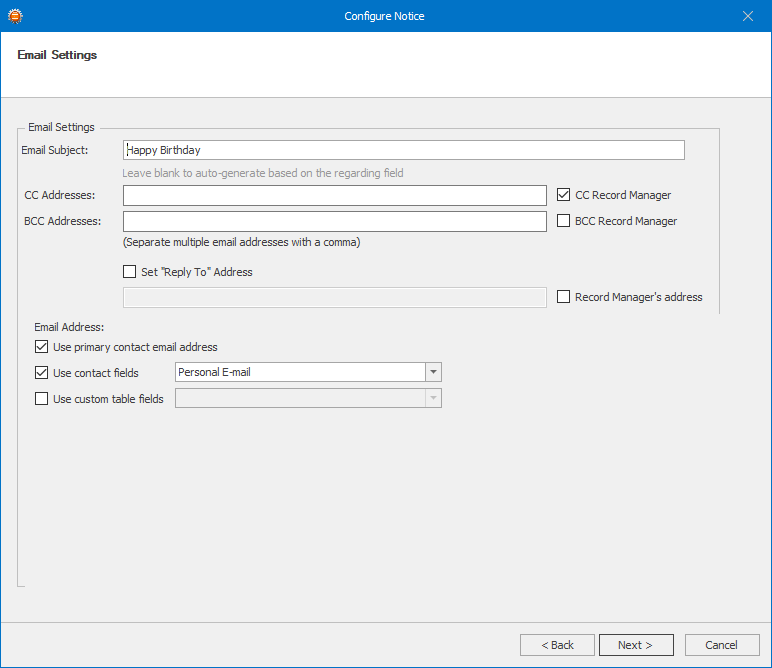
- On the Email Settings screen, enter an Email Subject. As required, enter any CC or BCC addresses in the provided fields. If you wish to CC or BCC the record managers of the Contacts rather than entering a static email address, enable the CC Record Manager or BCC Record Manager checkboxes as required.
- If you wish to change the Reply To address of the email message, enable the Set "Reply To" Address checkbox and either enter the email address, or enable the Record Manager's address checkbox to use the record manager's email.
- In the Email Address section, enable the Use primary contact email address. This is the main E-mail field in Act and will be enabled for most notices. If you wish to CC other email addresses, enable the Use contact fields checkbox, and select any additional email fields. If you are using a record type of Custom Table, you can also enable the Use Custom Table fields checkbox and select one of the fields in your custom table. Click Next to continue.
- In the History Settings section, enable the Record History checkbox to create a history record when a notice is sent. Select a History Type from the dropdown. If you wish to record the full email message to history, enable the Attach message file to history checkbox however, this will increase the size of your database's Attachments folder overtime.
- Click Next to continue.
Press Next and finally click Finish to save the notice. To save the notice to disk so that the Knowtifier service can load your changes, press the Apply button.
Knowtifier Logs
The Knowtifier logs are stored in the application data folder of the user set to run the Knowtifier service. In most cases, this user is the "System" account. Below are the default locations of this folder based on operating system type:
|Operating System|Folder Location| | 64-bit | C:\Windows\SysWOW64\config\systemprofile\AppData\Roaming\Knowtifier | | 32-bit | C:\Windows\System32\config\systemprofile\AppData\Roaming\Knowtifier |
In case you have manually assiged a certain Windows or domain user to run the Knowtifier service, the log folder can be found at the following location (replace USERNAME with the username of the windows or domain user account): C:\Users\USERNAME\AppData\Roaming\Knowtifier