Attachments4Act Manual
Setup BackBlaze
Please note that this step is not needed if you are planning to save your documents on your network
Create a Backblaze Account
Go to https://www.backblaze.com/ and either sign in or create a new account for their B2 Cloud Storage product line.
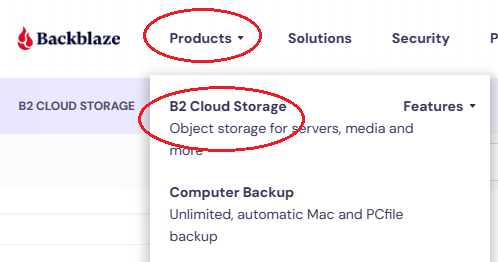
Create a Bucket
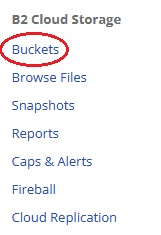
- Create a new Bucket. This is similar to a Windows folder and is where all of your attachments will be stored. Click the Buckets link on the left-hand menu at the backblaze.com website:
- Click the “Create a Bucket” link:

- In the Create a Bucket dialog, give your bucket a Unique Name and it MUST be made Public. The files are hidden and not publicly accessible without the unique link. In order to be accessed from Act, they must be made Public.
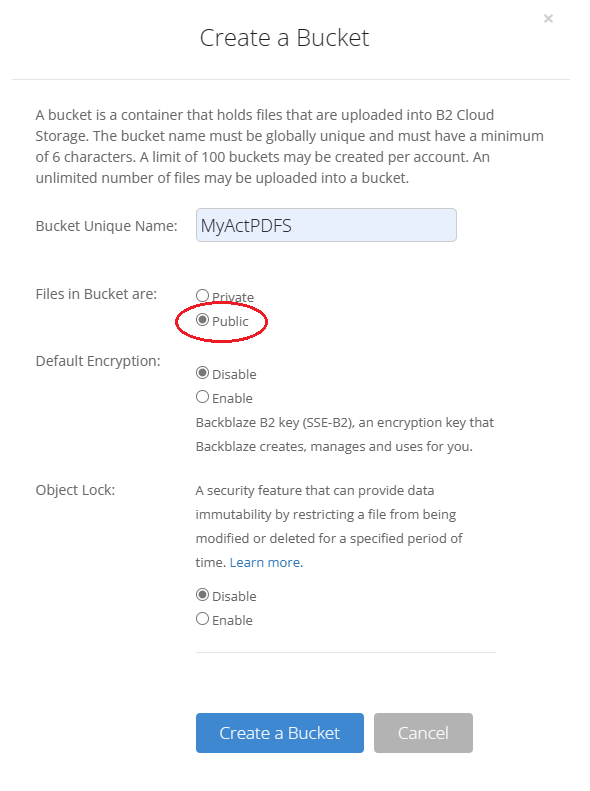
- Click the blue “Create a Bucket” button after you’ve selected your options.
- After creating a bucket, it Backblaze will show information. The Bucket ID must be copied and entered into the Attachments4Act application. The Bucket ID can be found as shown below:
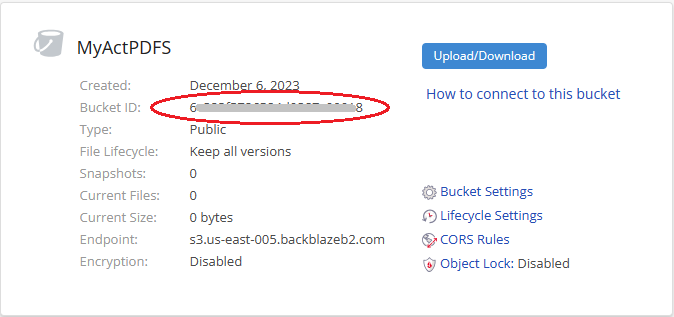
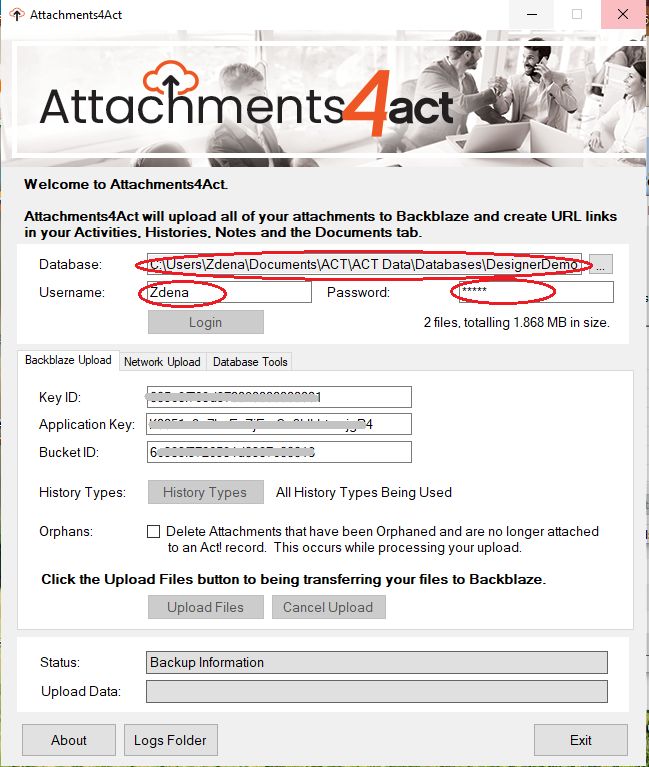
- Enter the above Bucket ID to the below location in Attachments4Act:
- After creating your bucket, you’ll then create an Application that will have access to your Bucket.
Create a BackBlaze Application
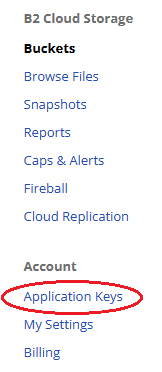
- Create a new Application by clicking Application Keys on the left-and menu:
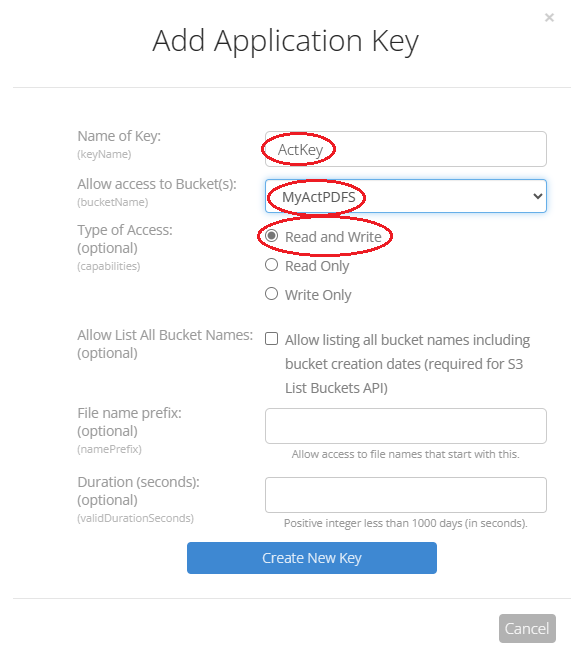
- In the Add Application Key dialog, give it a name, set access (All is preferred) and it must have Read and Write access, as shown below:

Setup Attachments4Act
Install Attachments4Act
- Download the installer from http://www.act4work.com/files/Attachments4Act/
- Close your Act!
- Right-click the installer and select run as administrator
Setup Attachments4Act Settings
- Open Attachments4Act
- Select your Act! database and enter your login credentials
BackBlaze Upload
To upload your attachments to BackBlaze, please ensure you have correctly entered
- Your BackBlaze Key ID
- Application Key
- Bucket ID
Network Upload
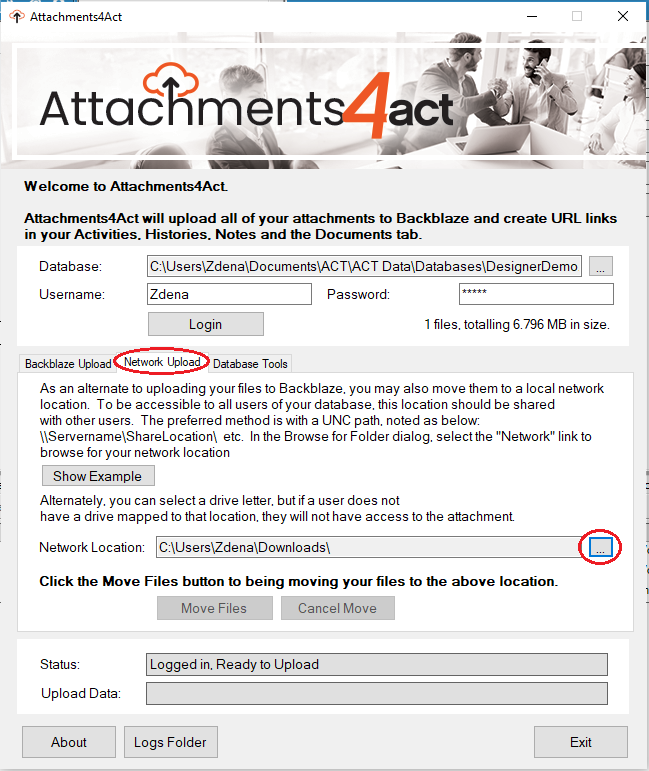
To upload your attachments to different area of your network, select the Network Upload Tab and browse to your destination folder.
Database Tools

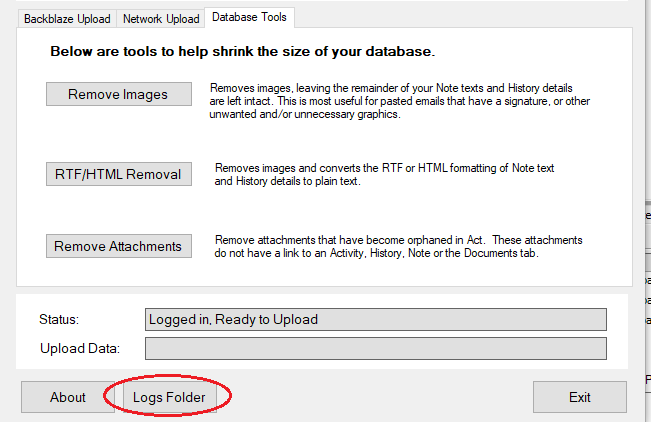
Remove Images
Removes images, leaving the remainder of your Note texts and History details intact. This is the most useful for pasted emails that have a signature or other unwanted and/or unnecessary graphics.
Any image file attached via the Attach File button with Activities, Histories, Notes or the Documents tab is removed. Inline images with note/history/activity details are not removed
RTF/HTML Removal
Removes images and converts the RTF or HTML formatting of Note text and History details to plain text.
Remove Attachments
Removes attachments that have become orphaned in Act!. These attachments do not have a link to an Activity, History, Note or the Documents tab.
Log Files
Each upload/ move / clean-up action generates a log file. If you wish to review the logs, they can be accessed through the Logs Folder button.
